Friday, 21 March 2014

Cleaning Bucket

Helllllloooooo!

So I have been a little MIA the last two days as on Wed I cleverly placed my hand on the stove top (forgetting that I had just cooked veggies for the girls)... MAN it hurt and although it is still uncomfortable now the burning sensation is gone (thankfully) and for the most part I have use of my hand.

This post is about your cleaning bucket...

I have a cleaning bucket... Well technically I have a few... A car cleaning bucket, cleaning stuff storage bucket, cleaning bucket, then I have stuff scattered throughout the house. PLUS I have a design on an accident cleaning bucket (more about that later) :-) I just cannot help myself.

I believe there is merit in having a cleaning bucket (or 5 if you are me). I have to be very clever with my time or I end up with unmopped, unvaccumed, chaotic mess all through my house. This being said, with my cleaning checklist being reinstated in my house things have been less chaotic and I have found that I am a little more organised and less time poor. 

Now the reason that I have two buckets is because all the products in my old bucket were empty (because I was so in love with them) so I created another one "temporarily" until I could afford to replace all the bits and bobs in my original one. 

My Original Bucket


My original bucket was formed when I lived and taught in a mining town in WA. The town was iron ore central and apart from everything being a beautiful shade of terracotta red, I knew that the "elements" around me weren't exactly healthy. So I made the call to keep my chemical intake to an attempted minimum. I was invited to a "party", you know the ones where you have a host and a salesperson... and although I was trying to hide that I was pregnant (possible not so well- as I dashed repeatedly to the toilet). I still managed to buy a fabulous product (that smelt so yummy!)


These are by a company called Nature's Direct. At first I was a little skeptical of the "power" of these products and although I used them it wasn't until I needed to clean a stain on the carpet and used their carpet cleaner that I realised actually how good these products are. I had a stubborn stain on the carpets in our place and used this product on it. Although having used warm water and soap and that not working their carpet cleaning spray worked a dream. I haven't looked back. 

Now my problem is that I have run out of product. You can buy the refills (I just have to get off my proverbial and organise). If you have the money they really are worth every cent.

In the meantime I have created a temporary bucket for myself (god forbid I have an unclean home)


Ok so maybe it is more of a cleaning cupboard than a bucket...

Mortein
I am not a huge insect lover... Well more the Arachnids and Cockroaches so I always have some Mortein (for that moment that we come face to face- I HAVE been known to faint depending on the arachnid. I am getting better).

Finish Dishwashing Tablets
I have never been a dishwasher user (in fact the house I lived in last year had a brand new dishwasher that until we moved out had never been used). But for time efficiency I have been utilising the load and go functionality of a dishwasher. I LOVE the finish tablets, the seems to leave my things clean without that funky grainy residue that I have seen some dishwashers leave.

Morning Fresh Dishwashing Liquid
I still love my washing up (really?) and therefore I always have morning fresh in my cupboard (I do like mixing up the scents of these ones).

Domestos
I am not a huge bleach user (B LOVES the stuff) as I find my teeth get really sensitive and it is like my gums get... tingly (not in a good way). My teeth and gums ache I guess. So although I can see the merits of bleach for toilets etc. I personally don't use often... But I leave that up to B. 

Glen 20
I do have a can of glen 20 in the cupboard. With all the sickness that we have had in the past I do keep a can in the cupboard. It is able to kill a lot of the germs that can make you feel icky and quite unwell.

Windex
I am not sure about you but I like clean windows and I think that Windex is the best product for that. I do recommend that IF you use Windex the best way to avoid streaks etc is to use a Microfibre cloth.

Earth Choice Bathroom and Shower Spray
Hidden behind the Windex is Earth Choice Bathroom and Shower Spray. I love this for the bathroom. It has a really lovely fragrance and is a fabulous product.

In the bottom of that cupboard I also keep some paper towel, some cloths and a dustpan.

I also find that good old soapy hot water is great for cleaning lots of surfaces too. In blogs to come I will be sharing with you some household products that have more uses than you realise. Also through this series we will work together to create our own cleaning buckets :-)

I would love to know what your have in your cleaning bucket!

Keep smiling

Lauren
xxx


Tuesday, 18 March 2014

Divine Desks

As you know I upcycled a writing bureau last year. Those of you that have been following me know in hindsight I wasn't 100% happy with it. I'm not sure what it was. Maybe the fact that I felt like I rushed it or the colour combinations, as you can tell I am not sure BUT l came across a photo on Pinterest that took my fancy and decided that I knew why I wasn't sold on the writing bureau. It wasn't actually the look I was after but I had a sentimental attachment to the idea of it. A writing bureau, done right, looks amazing and because what I had created felt wrong, it didn't sit right.

I plan to redo the writing bureau (I have already begun) but in the meantime I still wanted a desk but had to find something that worked for me, now.

Then I found it.


The desk was fabulous in its original form BUT I found the stain quite dark. When I got the desk back home it had been painted and waxed so I gave it a light sand and a much more vigorous sand on the top (that wood stain was tough to remove). I then used the same paint that I have been using through my furniture renovations (Taubmans Water Based Enamel Trim -Satin in Dulux's USA Antique White). I didn't have to do too much because the previous owner had done a really good job with the basics. 

Once that was done I prepped the desk top. I then applied a clear coat. I had snuck off to Ikea on my way back from collecting the desk and purchased a few items to decorate my desk. Overall I was happy with my purchase and minimal upcycle... BUT I wanted to point out how a little bit of sanding and painting can make a huge difference.


See?!

The pencil holder, candle, vase and artificial flowers were all from Ikea.

Now I just have to find the perfect chair to place with it.

Hope that it inspires you!

Keep smiling!

Lauren
xxx


Monday, 17 March 2014

Food Preparation

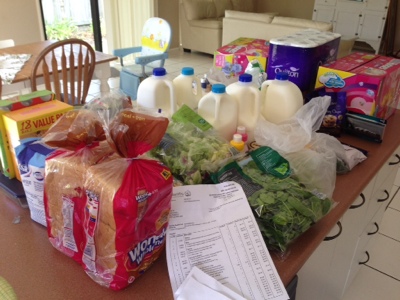
Hello lovely people! I hope that you have had a wonderful weekend. The weather here was lovely and balmy (it might be heating up now) and if you ask B the surf was pumping. B, the little ones and I usually start out weekend with a Friday night BBQ by the river. We have created a little tradition with some friends to meet on a Friday night and slowly but surely, the group has been growing in size. As you are aware now I have been getting my groceries delivered (I'm terrified of the prospect of 3 under 3 at the supermarket). I LOVE that I can select my delivery times and the ease of the purchase. However this Thursday when I did my grocery shop I had clearly removed my brain. When it cam to selecting the time for delivery there were only two times available (and closing soon) and I thought "sweet, they have 6-9 available" so sure enough I clicked on it and didn't give it another thought.... Stupid Lauren! In the morning when I went to "track" my delivery it said 6-9 PM I nearly had a heart attack. Especially when I realised that it was Friday night and I had to be there for the delivery. So sure enough the BBQ got moved to our place (whoo hoo). Sadly not everyone could make it but that took the pressure off a little. My two gf's were perched on my breakfast stools watching me unpack my groceries... Then came their entertainment...

I admit that my organisation and cleaning is a little OTT but I truly find that without it I am in chaos and I don't feel like I ever get back on track and I am constantly chasing my tail. My food preparation is the same.

I have mentioned in my meal plans post that by 5pm my little ones are tired, hungry and wanting all of my attention, doing food preparation is something that induces stress and anxiety. I really love cooking too so I had to find a way to bring happiness back into my cooking. This involves being organised.

When I get my groceries I put everything away except the groceries that go in my fridge. Usually the first thing that you would do is put away the cold stuff but I keep my veggies, fruit and cheese out. Why? Because I go all OCD on this stuff. :-)


I have to credit The Organised Housewife for the cheese cutting idea. I have followed Kat's blog for years and although my cutting veggies has been something I have always done, Kat has certainly assisted me in refining these skills (incredible lady!!!!!) So as you can see I usually buy a big block and then cut it in half and chop half the block and grate the other half. The reason that I both grate and chop is that I usually use grated cheese for recipes (and those bags of grated cheese add up) and the other reason is that the girls LOVE cheese. I like to be able to go to the fridge and grab out a few containers and know that the girls have a quick healthy snack (plus I am far better of grabbing a cube of cheese that a packet chips or chocolate.


Grapes. Mmm. I have always loved green grapes but found walking around with them on a stem inconvenient but it always took time to pull them off. As the girls have gotten older they have shared my love for grapes but I have been finding the stems everywhere (and I think in shoes counts as EVERYWHERE!) so I made the call that well, they are in the fridge so they can go in a container. So I just pick them off the stems and into the container they go. This has been great and I know the girls are loving it (sneaking into the fridge and taking off with the container).
 

My carrots are another obsessive thing. I have done this for years now and whether you are a peel or not to peel lover doesn't matter... I want to add here that when I store these I do place a piece of paper towel in the bottom to absorb some of the condensation that seems to accumulate in the container. I do these for all my veggies (pumpkin, broccoli, cauliflower, carrots) as no one likes soggy or slimy veggies.


I just want to add here that B and I found THE best veggie peeler ever at Ikea. It is heavy for a peeler but has stayed sharp through all it's usage. I love this so much it have invested in some "spares". I have been known to accidentally throw out my peelers (and teaspoons- go figure).
 

As you can see here I usually cut watermelon, mushrooms (or I cheat and buy them precut- whatever is most cost effective that week), broccoli, caluiflower, pumpkin, carrots and cheese. 


I use the Sistema range of containers for my fridge and as mentioned above I do place some paper towel in the bottom of the vegetable ones to absorb some of the moisture. My veggies are usually good for at least a week and in some cases up to two. If you do pop over to Kat at The Organised Housewife you will see that she has trialled a few different containers and at the moment is working with some of the Howard's Storage World containers. It really is a case of budgets. As long as the container you use is air tight and unusable in the fridge you are onto a winner.

Not only do I find that prepping my food frees up some of my fruit and veg crisper but it makes it so much easier to go for a healthy snack (that is already pre cut or pre prepared) but it saves time and takes some of the the stress out of cooking.

Have fun and go wild!

Keep smiling

Lauren
xxx


Wednesday, 12 March 2014

Checklists

Since I have moved my cleaning routine has gone out the window. I had created a FABULOUS checklist that meant that I had something to refer to everyday. Having said this, it is about to be relaunched in this household. My house is not unclean by any stretch of the imagination but I spend time fluffing around trying to remember what I need to do next, when I had my checklist I didn't have this issue.


Creating a checklist
When you create a checklist you need to think of the things that you want to do around the house. The one that I created was fairly comprehensive and covered all the things that I needed to do to ensure that if I had an inspection there wasn't any last minute panic over trying to get the house in order (bear in mind that in one of my previous posts I talked about the real estate agent that had it in for me). There are lots of checklists on the internet and I know that there were a lot of things on their lists that we just not feasible for me. 

Why create a checklist
When I moved to the SC I wanted things to be orderly again. I had missed my belongings and having my own stuff and I just wanted to feel settled. Mum and dad's place will always be home but I wanted to feel the same way about the four walls my family lived in. I soon realised that there wasn't enough time in a day to clean all the things that I wanted to clean and fix and doing it in one hit with two little ones nearly sent me loopy. I would get one space tidy, walk away to clean another space, turn around and the original space looked like I had never been there. I was getting sick of dishes in the sink, clothes on the laundry floor and then the maintenance jobs I needed to do weren't getting done because I was chasing my tail constantly. I read somewhere that doing alititle but everyday reduces the BIG clean that you might do once a week. PLUS I found that I actually had more time through the day AND I had a clean house... Crazy right?!

I was getting the morning jobs done first thing which left me time to spend with the girls and then I would do the afternoon jobs when the girls went to sleep. This also meant that I had a clean house when I went to bed (I had my first introduction to GIANT cockroaches when I moved to Qld).

My Checklist
Above is my checklist. You can see that I have my AM and PM list (it was in a table on the original). Underneath the AM and PM are some other jobs grouped together. Each group represented a day in the month. As you can see I have five weeks because I wanted to cover a whole month...plus not every month starts on a Monday. So what I used to do (and WILL be doing) is printing this list out. Placing it on the fridge and writing the dates in (as if it was a blank calendar) and voila... Off I go.

Having moved into another place and it being a little different (ie vertical blinds not curtains) I will tweak this list a little and depending on how clever I am I will even attempt to make it prettier :-o

Things To Consider
I understand that some of you are working professionals, some of you are students and some of you are stay at home parents... We all have varying lifestyles right... Think about the space that you live in. Do you rent or own? What are the primary things that you want to achieve? For me, at the worst I want the beds made, the kitchen and bathrooms clean and the washing done. So for me they were vital to do. For you, it might be vital that the toys are packed away, that the lounge is tidy and the bathroom is clean. 

I always remember a saying I read on my favourite blog The Organised Housewife.

It only takes a minute.

Out your whole day doing something only takes a minute (Ok in some cases ten) BUT doing lots of little things over a week saves you spending a huge amount of time on your Sat or Sun (or whatever your cleaning day).

Good luck. If you have any questions or want help creating your own cleaning list send me an email at ruffled.lace@live.com.au (I might even be able to make it all pretty for you).

Keep smiling!

Lauren
xxx

Tuesday, 11 March 2014

Under The Sea

As most of you know I have two toddlers and an infant. Some people think that we are crazy and some knew that even before we had children, I wanted my little ones close together in age. I am also a qualified teacher and I miss being in a classroom with lots of smiley kidlets but I wouldn't give up my time with my children for anything right now.

So I have decided on a happy medium. Last year I got really excited about doing some activities with the girls... Activities which to date we have not completed. Thus I introduce to you (drumroll please)... Kidlets Craft! Every Wednesday I am going to share with you all a weeks worth of activities for the following week. Now I understand some of you may be time restricted and that is totally fine. It's about having some activities in your " play" bank. Because I am a teacher I like things themed and in groupings (this also ties in with that perfectionism I have laughed about).

Here we go. Remember I am trying to occupy two spirited toddlers... You don't have to follow this format. One thing I will add is make sure you have smocks for artwork... Big W, KMart or Spotlight have smocks (plastic are fab for wiping down) just check your local supermarket or dollar store sometimes they have stocks...

UNDER THE SEA

CRAFT:

Monday- Fish Decorations
Things needed: blue card (or paint some card in blue), white card, icy pole sticks, glitter, glue, sequins, tissue paper, scrap paper, paint
What to do: Cut out some under the sea animals from the white card and paint in chosen colours (you can use coloured card here instead). Cut a line about 2cm from bottom leaving about 2cm uncut at either end (this is to slip your icy pole stick through). Decorate your water scene and your sea creature. Once you have done that attach your sea creature to the icy pole stick.

Tuesday- Handprint Crabs
Things needed: white paper and paint (your choice of colour)
What to do: Get your little person (or people) to put paint on their hands. You can roll this on or get them to dip their hands in paint. Get them to place one hand on the paper. Place the other hand on the paper ensuring that the palms overlap. When the paint is dried draw on some eyes (or if you have them glue on some googly eyes).

Wednesday- Bottle Jellyfish
Things needed: empty water bottle, paint, plastic braiding string (dollar store, Big W, craft shop) googly eyes
What to do: Cut the bottle in half. Get your little person to paint the inside of the bottle. When it has dried poke some holes near the bottom of the cut edge. Feed some of the braid string through the holes (I found it easier to fold braid in half and feed that through holes then put lose ends of braid through the loops). Glue on the googly eyes.

Thursday- Thumbprint Fish
Things needed: Large white card, paint, coloured markers
What to do: Get your little person to put their fingers in the paint and place on the paper. Put as Manu on as you like. Once the paint has dried draw on your creatures ie tentacles for jellyfish, fins and tail for fish, legs for crabs.

Friday- Shark Hat
Things needed: white card, colouring pencils, sticky tape or stapler.
What to do: Cut a long strip of paper and fit it around your little persons head, get them to colour it in. Tape or staple together. Cut out another strip to go over the head, get your little person to colour this too. Measure this also and tape to the other strip. It will create almost a helmet look. Cut out a tail and a fin, again get your little person to colour this in also and attach the fin to the top strip and the tail to the back of the other strip. Now go and have fun playing games with the shark helmet.

Please if you find the credits for these images let me know so I can adjust.

Tips: I found that because my two are quite little and need some direction, I pre cut anything that needed to be cut and did an extra one so that I could do it with them and show them what I was doing. Make sure they are wearing smocks because inevitably the paint goes everywhere. My best advice is use the weekend to collect any items you need and have it all ready in a craft box for the week.

OUTDOORS:

Monday- Don't Fall in the Sea
Get some paper, card, placemats or cushions and place randomly over the floor. Make sure you place them so that with a small jump your little person can reach them. The idea of this is to get your little one to jump or step from one spot to the next one without falling in the sea. Best way to do this is play on their imagination. Tell them that the carpet, grass or tiles is the ocean and there are animals in there and the person that can jump from spot to spot without falling in the sea wins. This is a fabulous activity to work on your little persons balance.

Tuesday- Water Play
This can be a bucket, a water table, a bowl, the bath tub... It's a very simple one. Let them play.

Wednesday- Water Garden
I want my little ones to feel like they help in the garden because they really do love helping AND they love water. I just hook up the hose, put on their gardening shoes and our we go to water the garden.

Thursday- Bubbles
You can buy some of those bubble wands from a dollar store (or make up your own mixture - Google is fab) and sit in the yard with them and get them to catch the bubble.

Friday- Water Balloons
This one can be a little wet so pop some bathers on (and slip, slop and slap) and fill up a bucket with water balloons. Place them in the yard on the grass and get them to jump in the water balloons. Another idea for the older ones is to simply throw water balloons and the person that is the most dry wins.

 I hope these inspire you to have a little crafty, messy and totally memorable fun!

Keep smiling

Lauren
xxx


Monday, 10 March 2014

Marvellous Meatsafes

I'm a little excited to share with you my most recent Furniture upcycle...

B and I decided when our lease came up at the end of Oct. that we would move. Aside from the fact the neighbours had been kicked out (thank goodness) our property manager had it in for me. Not B. Just me. Not that I minded because I really didn't have to deal with her but it certainly made things uncomfortable, especially around inspection time. So, with a little assistance we found a really lovely home a little off the coast. 

Heavily pregnant B and I moved all our worldly belongings to our new home and settled in. I have often put thought to buying and knocking down the back rooms to give us more yard and going up for all the things that we need but I have gone against that as I might as well build on a block if I am going to start thinking about renovating and really... I do it in every house I am in.

Over the last few months I have stared at my kitchen living space and felt like one wall was very bare and screaming for some love and attention. So love and attention it got. 


For those of you that have read my blog you will know that I upcycled the buffet on the left and I also upcycled the coffee table. Before I did my little meatsafe upcycle, there was nothing running along that right wall so as you can imagine it was looking a little bare to say the least. B bought me the rocking chair when I was pregnant with Isabella (somehow it has avoided my desire to paint everything white). So I popped that in the corner (keep your eyes peeled for another post about this chair). I then searched and searched from something to run along that wall... It took me weeks but BAM! There it was. A vintage meat safe.

 
Apart from the harrowing car ride to get the item (that is a WHOLE other story) which ended in me blubbering in my mother in laws arms.... It was perfect. The previous owners had obviously attempted to "restore it" (using a nail gun mind you) and it showed some signs of neglect... Not only in the paintwork but the wood... Overall though it was in very good condition for its age.

I purchased and collected this item while my mother in law (MIL) and father in law (FIL) were here and my father in law is one of those people who cannot sit still (like father like son) and as an added bonus is a very handy person to have around with things like this. So we had a discussion about what I wanted to do (replace the top of the cupboard- again they used a NAIL GUN... Tut tut) and off he set to the wood reclaimers up the road.

He came home with some beautiful tongue and groove floorboards. Yes I know they are floorboards but they are unique and vintage and suited this project perfectly.


We started by removing the top of the meatsafe and leveling it up. Once we did that FIL cleaned up some of woodwork, removed the doors and cut the floorboards to length. He then sanded them back a little. Once that was done out came the orbital sander. Now sadly I am one of those people who like a clean surface but b's orbital sanding pad is not attaching to sandpaper pads very well at the moment (oops!) so I just gave the entire surface a light going over so that I had a good surface for painting.
 

I used an aerosol undercoat from Bunnings (there are a few) and then used my trust Taubmans Accent Satin paint in Dulux's USA Antique White (this is the same paint and colour I have used for all of my other projects). After each layer I gave it a light (hand) sand and then wiped over and applied another layer. In total I applied two coats of paint to this project. It helped that it was already white. 
 

I then sanded back the top until the timber was "clean" but I didn't want to go too nuts because I like the character of the timber. While I waited for all of this to dry I worked on the doors. I removed the mesh, tacks, handle and hinges and sanded the surface. I applied the undercoat and once that had dried I applied two coats of paint. The mesh was in good condition, I would suggest it was new so once the paint dried I reattached the mesh with the original tacks. I then reattached the hinges and the doors to the meatsafe. I decided I didn't want to reattach the handle so I ordered more of the crystal door handles like on the buffet from eBay (they arrived today - yippee!)
 

I gave it a quick wipe, put it in its new home and filled it with my recipe books that I had hidden in my glory box.
 
 
Voila! My new and improved meat safe.

I am totally in love!

Keep smiling

Lauren
xxx


Sunday, 9 March 2014

Meal Plans

Having three little ones under four is hard work (I am not going to lie), however I find that when I am disorganised it seems so much harder, my patience is much thinner and I find that I subsequently feel out of control (and I am POSITIVE that the girls feed off that stress). I have noticed that on days when I get all of the essentials out of the way, I am much calmer and the days seem to be more "doable" and B doesn't get the "I'm having an ass of a day" phone call. I was having a laugh today with the girls at PG (Playgroup) about how much of a perfectionist I am and my meal plans etc and I thought that it was the perfect kick off to me "honing" my blog.

For me, as I am sure it is for all of you, feeding the little ones and yourself is really important. I have to be honest I am not the most inventive lunch maker (we are going to work on that)... But one thing that I do have sorted nearly everyday is the dinner. I don't know about you, but to organise dinner any later than 3pm is a nightmare... Miss 3.5 wants snacks all afternoon and bosses her sister around when she is hungry (she's a crank like her mother), Miss 1.75 gets around my feet and becomes needy, she wants cuddles and she grizzles (she does try to play with cranky but that always ends in tears). Master 10wks really is a good baby overall but certainly after 4.30pm is his whinging time.

I have found that I can be as organised as I want of a day but if I haven't planned the meal, got all the  ingredients and written it down somewhere, it still turns into chaos. So, to avoid this I meal plan. Now I have seen some pretty impressive meal plans (ie for the month) but I like to stick to my one (and if I am good) two weeks meal plans. This means two things... 1. I can organise my grocery list early and 2. When I am doing my shopping I can buy "specials" because I know that it will get used. 

B gets paid on a Thursday but I run my meal plans generally from a Sunday to a Sunday. The reason that I do this is because on a Sunday, I plan a big cook up for the week based on my meal plan (because B is around to help with little people). I can cook food in advance (sometimes in double batches) and freeze the meals.

Once I have decided on the meals I write my list (and decide what I CAN do in double batches to freeze) and I write my grocery list. I want to add here that I LOVE pottering around a supermarket and shopping for food BUT I HATE it with three little ones. Even just with Miss 3.5 and Miss 1.75, I found it really stressful when they threw tantrums for food or the iPad (yes, the used to sit in the trolley with the iPad, watching Peppa Pig). People weren't very understanding about children and were very quick to judge and I found that I was taking it personally. Ok sidetracking!!!! At the moment because of child logistics I have been having my groceries delivered. IT IS FABULOUS! All I do is find the groceries I want, click quantity, check list at end, click which products I am happy for them to substitute (if they need to), select what time I would like the groceries delivered and pay. I can see the merit of such a service for mummies like me and I can also see that for some people (ie working households) having a personal shopper would take the stress out of meals. I have to say though that once my little ones are old enough for me to brave the supermarkets again I will be there armed with my shopping list, (the iPad) and the trolley. :-)

So after all that, how do you effectively meal plan?

CREATE:
Create a meal plan that works for you. Print one of the internet, create one of your own. Make lots of copies of one or laminate and use whiteboard marker on one. Use your diary. For me, I have a calendar on my pantry door and write my list on that. Make sure that whichever way you choose to write your meal plan that you have it in a prominent place (or somewhere you can easily be reminded).


PLAN:
When writing your meal plan think about what you and your family are doing through the week. Do you have a party or BBQ? Will you be out all day? I find that because Sunday is my cook up day! to minimise chaos for me I am best to have a Slow Cooker meal that day which frees up my oven and stove for all my cooking :-)

CHECK:
Quickly check your pantry, fridge and freezer and see if you have anything in it that needs to be used up. That is a great way to reduce any food wastage.

Also check your supermarket of choice or butcher of choice for specials. This can help reduce your bill and sometimes buying whilst on special means that you can cook in bulk (planning ahead).

LIST: 
List your meals on your planner and from that write a grocery list. I find that if you go in with a grocery list you are less likely to impulse buy. This means not only are you creating healthy meals but you are reducing your expenditure and food wastage.

Some of you might feel that meal planning is a waste of time but I can honestly say that it is actually the complete opposite. Obviously I am time poor and being able to spend an hour planning and shopping reduces the hours I used to spend thinking about meals, getting everyone into and out of the car, wandering around the shop and coming home to prepare. Plus best of all... It saves my temper and sanity.

There are some fabulous meal planners out there and some brilliant blogs about it. My next goal is to plan lunches and snacks as well (wish me luck).

Take a look at some of the lovely ideas below that help to get Meal Planning down to a fine art :-)


 PHOTO CREDIT: Re-made Just Right


PHOTO CREDIT: Everyday Enchanting


PHOTO CREDIT: Etsy

Keep smiling

Lauren
xxx